
Introduction
You sit down to knock out one focused task, and within minutes the desk starts to shake, cables snag on your chair wheel, and your “quick switch to standing” turns into 30 seconds of button-mashing. That friction sounds small, but it breaks your flow in the exact moments you need momentum.
When you buy the wrong standing desk features, you pay for it every day: tense shoulders from a bad height range, micro-distractions from wobble, and a surface that never stays clear long enough for deep work. This guide helps you choose the features that protect focus. Follow the steps to set your height, map your workflow zones, and route power cleanly, then use one practical desk pick to implement it all.
6 features to choose standing desk for productivity
1: Lock your height range (so your shoulders stay relaxed)
Start by measuring two numbers you will actually use: your seated elbow height and your standing elbow height. Do it in your real shoes, with your real chair height, and with your keyboard on the desk. Set the desktop so your elbows land near a right angle and your shoulders do not creep upward; if you feel your traps tighten after 2 minutes, the surface is too high. OSHA describes neutral arm posture as elbows close to the body and bent roughly 90 to 120 degrees, which is a practical range to aim for while typing. According to OSHA, neutral positioning keeps elbows close and reduces awkward load on shoulders and wrists.
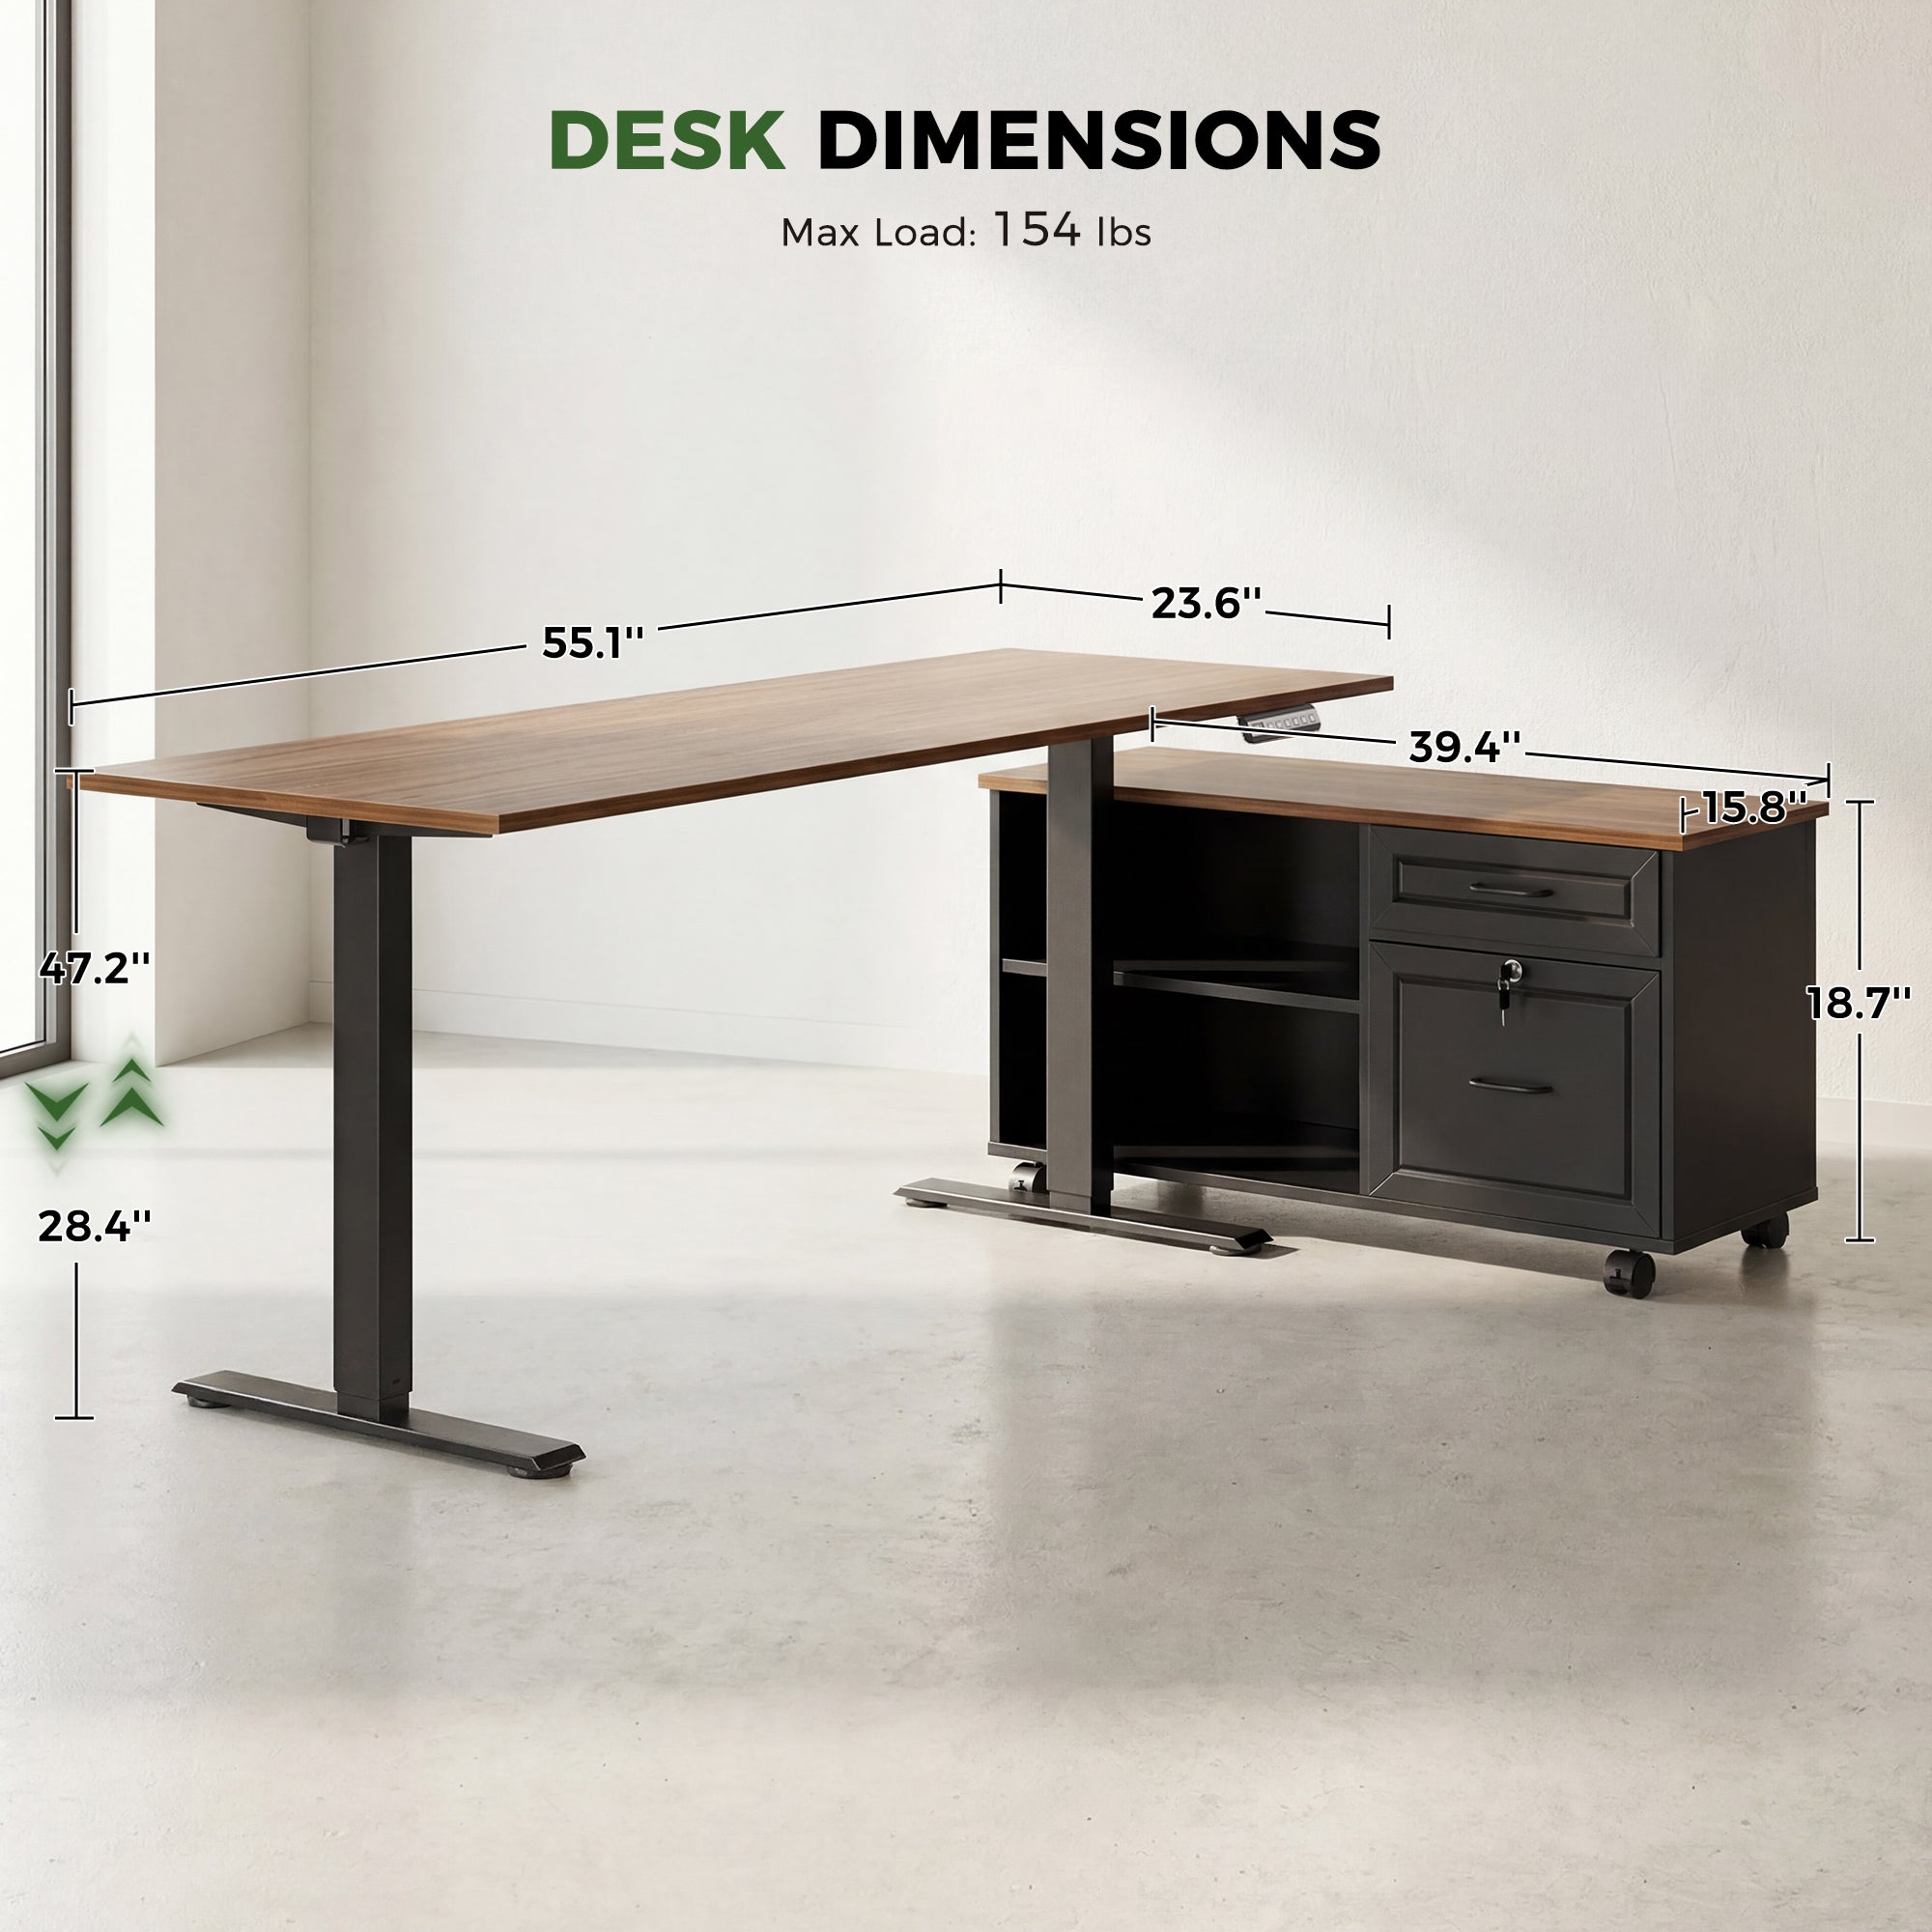
Use this as a quick fit check for the OffiGo 55-inch L-Shaped Height Adjustable Standing Desk with Large Movable Storage Cabinet: its height adjustment range runs from 28.4 inches to 47.2 inches, which covers many seated-to-standing transitions without forcing you to compromise posture. If your ideal seated number is below the desk minimum, plan on a taller chair plus a footrest, not a “shrug and cope” setup.
2: Prioritize stability at standing height (because wobble steals attention)
Test stability the way you work, not the way you shop. Raise the desk to your standing typing height, place both hands on the keyboard area, and type a few fast sentences while lightly leaning on the front edge. Watch your monitor corners: if they visibly shimmy, your brain will keep “checking” the movement even when you try to focus. Next, push gently side-to-side at the desktop corner (the worst leverage point) to see if the frame twists.
For a productivity-focused setup, stability is not a luxury feature, it is a concentration feature. Look for a steel frame, solid feet, and leveling feet that let you remove floor wobble. Then lock in your floor contact: adjust the feet until the desk stops rocking, and add a thin floor mat only after you level, not before.
3: Choose a desktop that fits your workflow lanes (not just your room)
Before you pick a size, sketch three “lanes” on the surface: (1) keyboard and mouse lane, (2) screen lane, and (3) paper/tools lane. If any lane overlaps another, you will constantly reshuffle items, which creates low-grade task switching. A desk can be “big” and still feel cramped if depth is wrong for your monitor distance and forearm support.
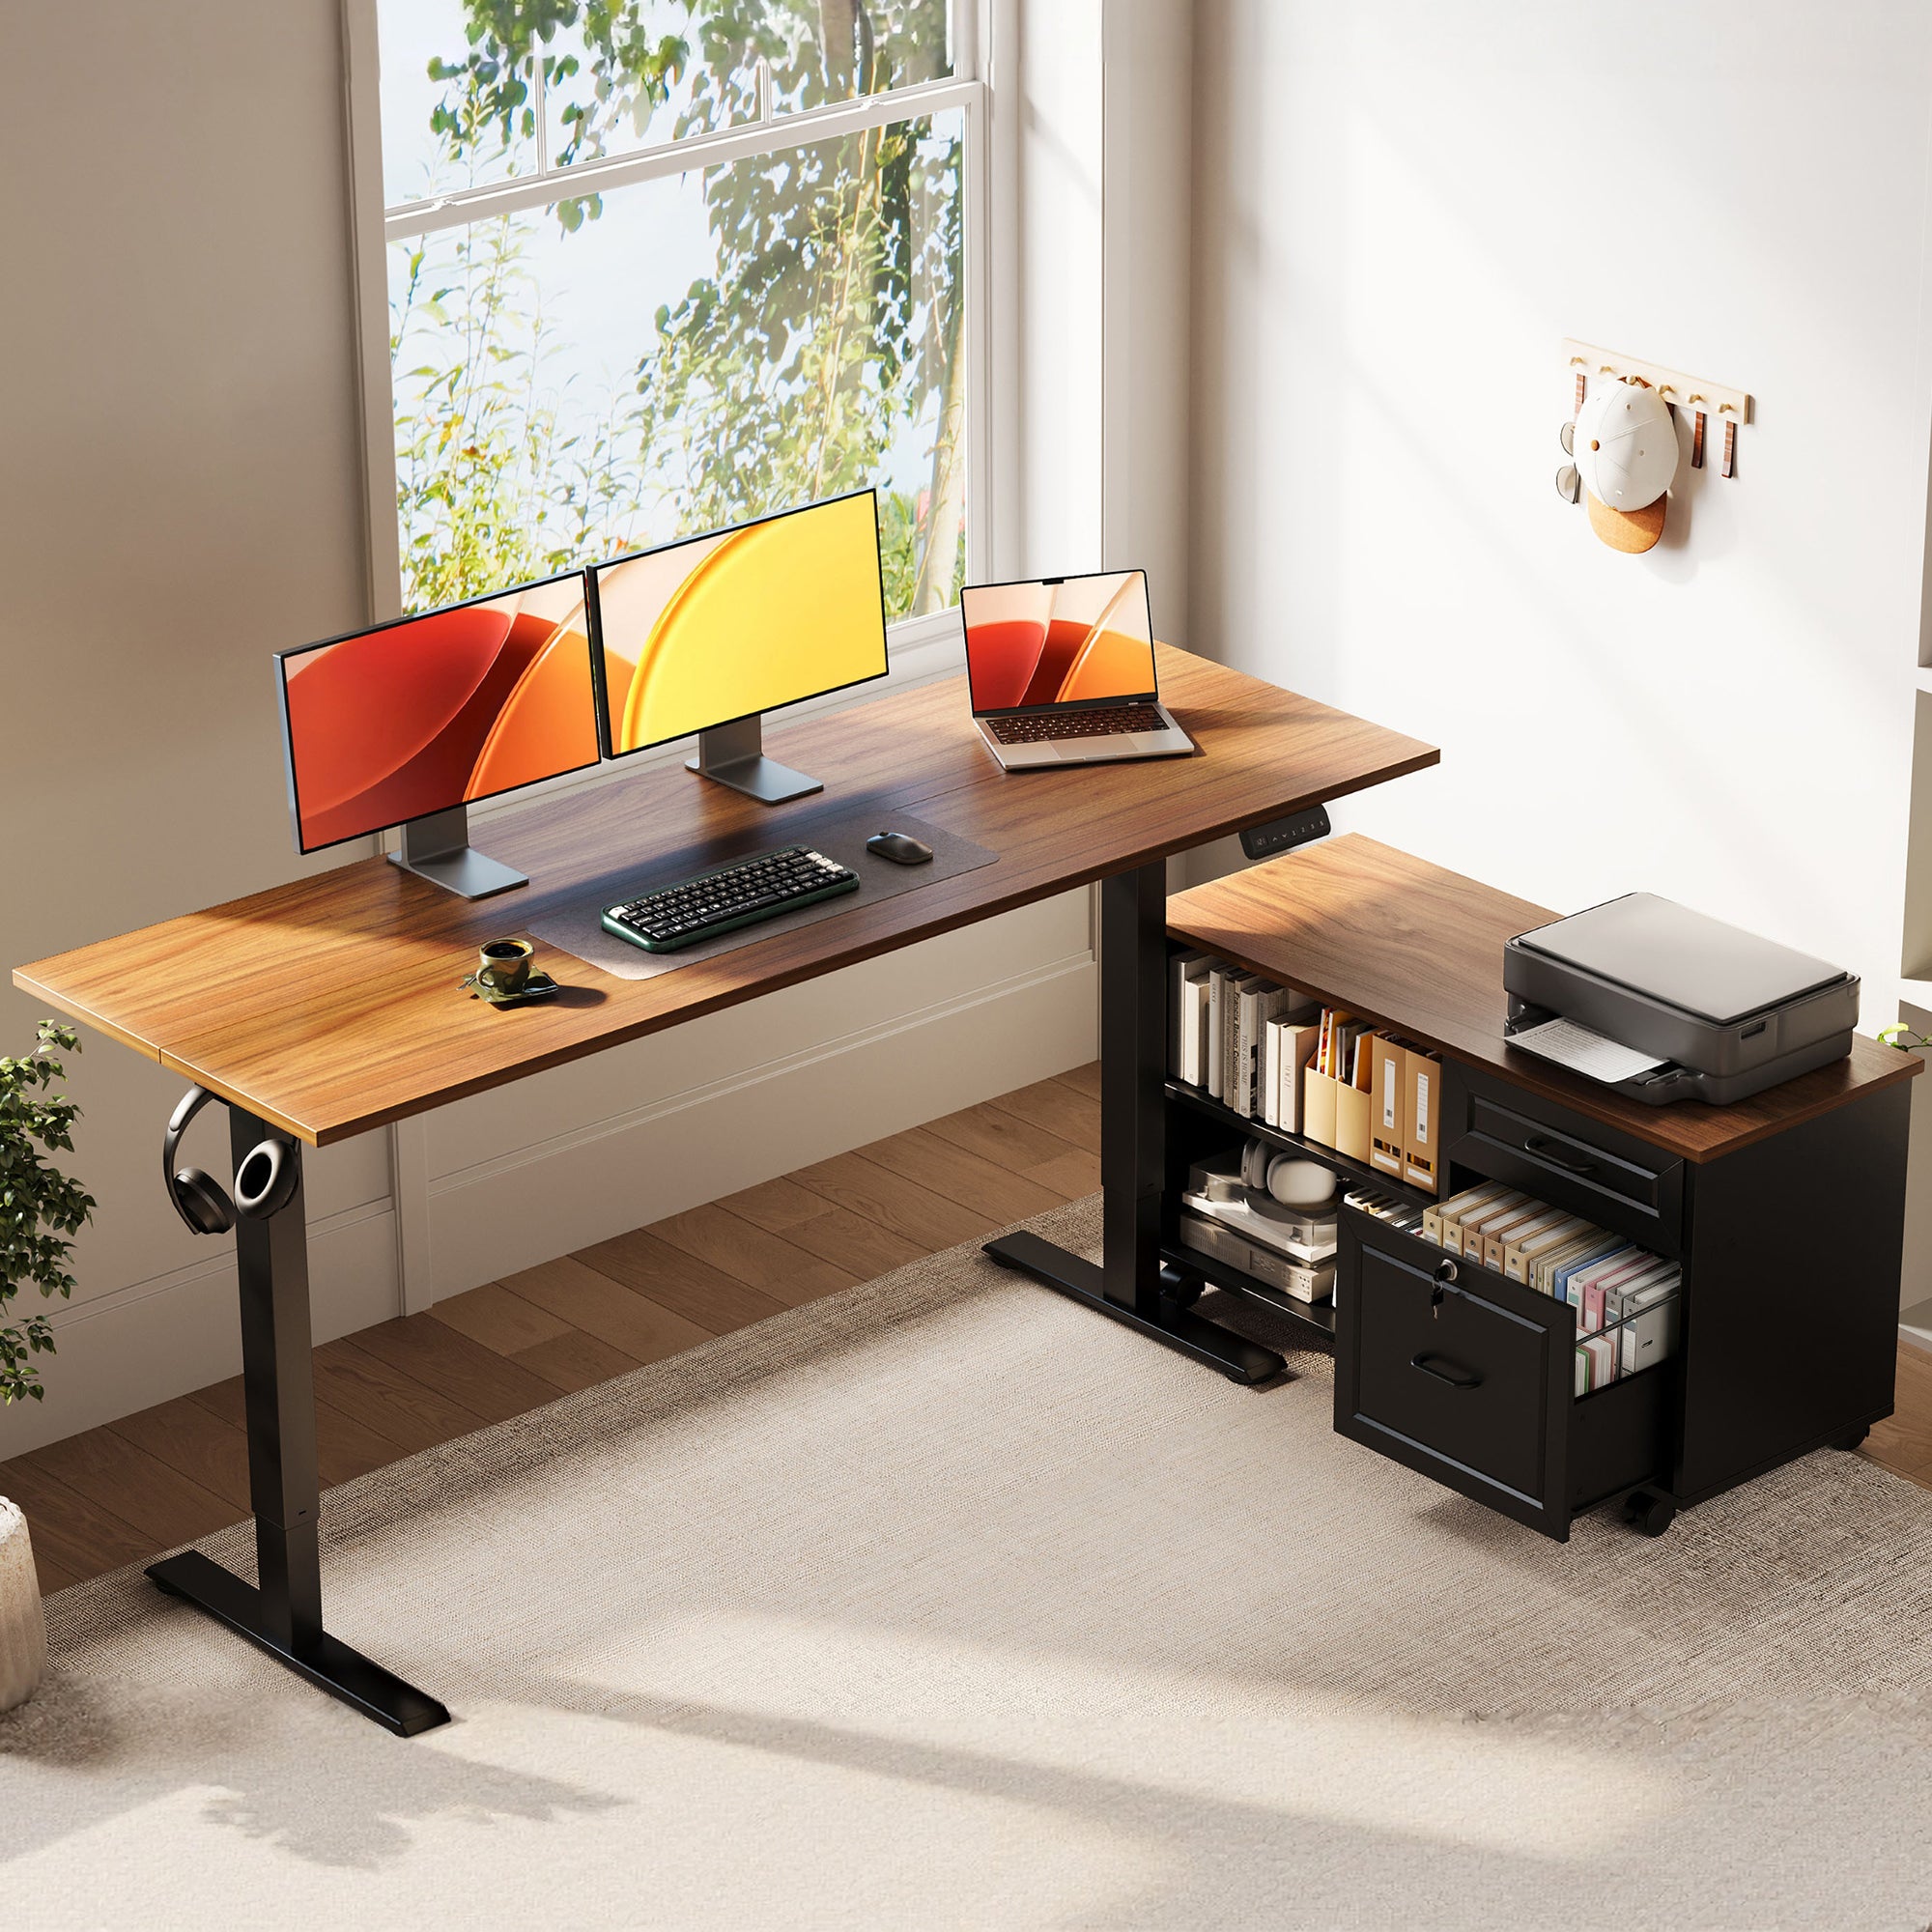
The OffiGo layout is useful for document-heavy work because you effectively get a main desktop plus a secondary surface on the cabinet side. The listed desktop size is 55.1 inches long by 23.6 inches deep, and the matching filing cabinet top adds another surface area (39.4 inches long by 15.8 inches deep). Use the main surface for your primary monitor and keyboard, and reserve the cabinet-top as a staging zone for a printer, scanner, or an inbox tray so your main lane stays clear.
4: Demand fast, simple controls (so sit-stand becomes automatic)
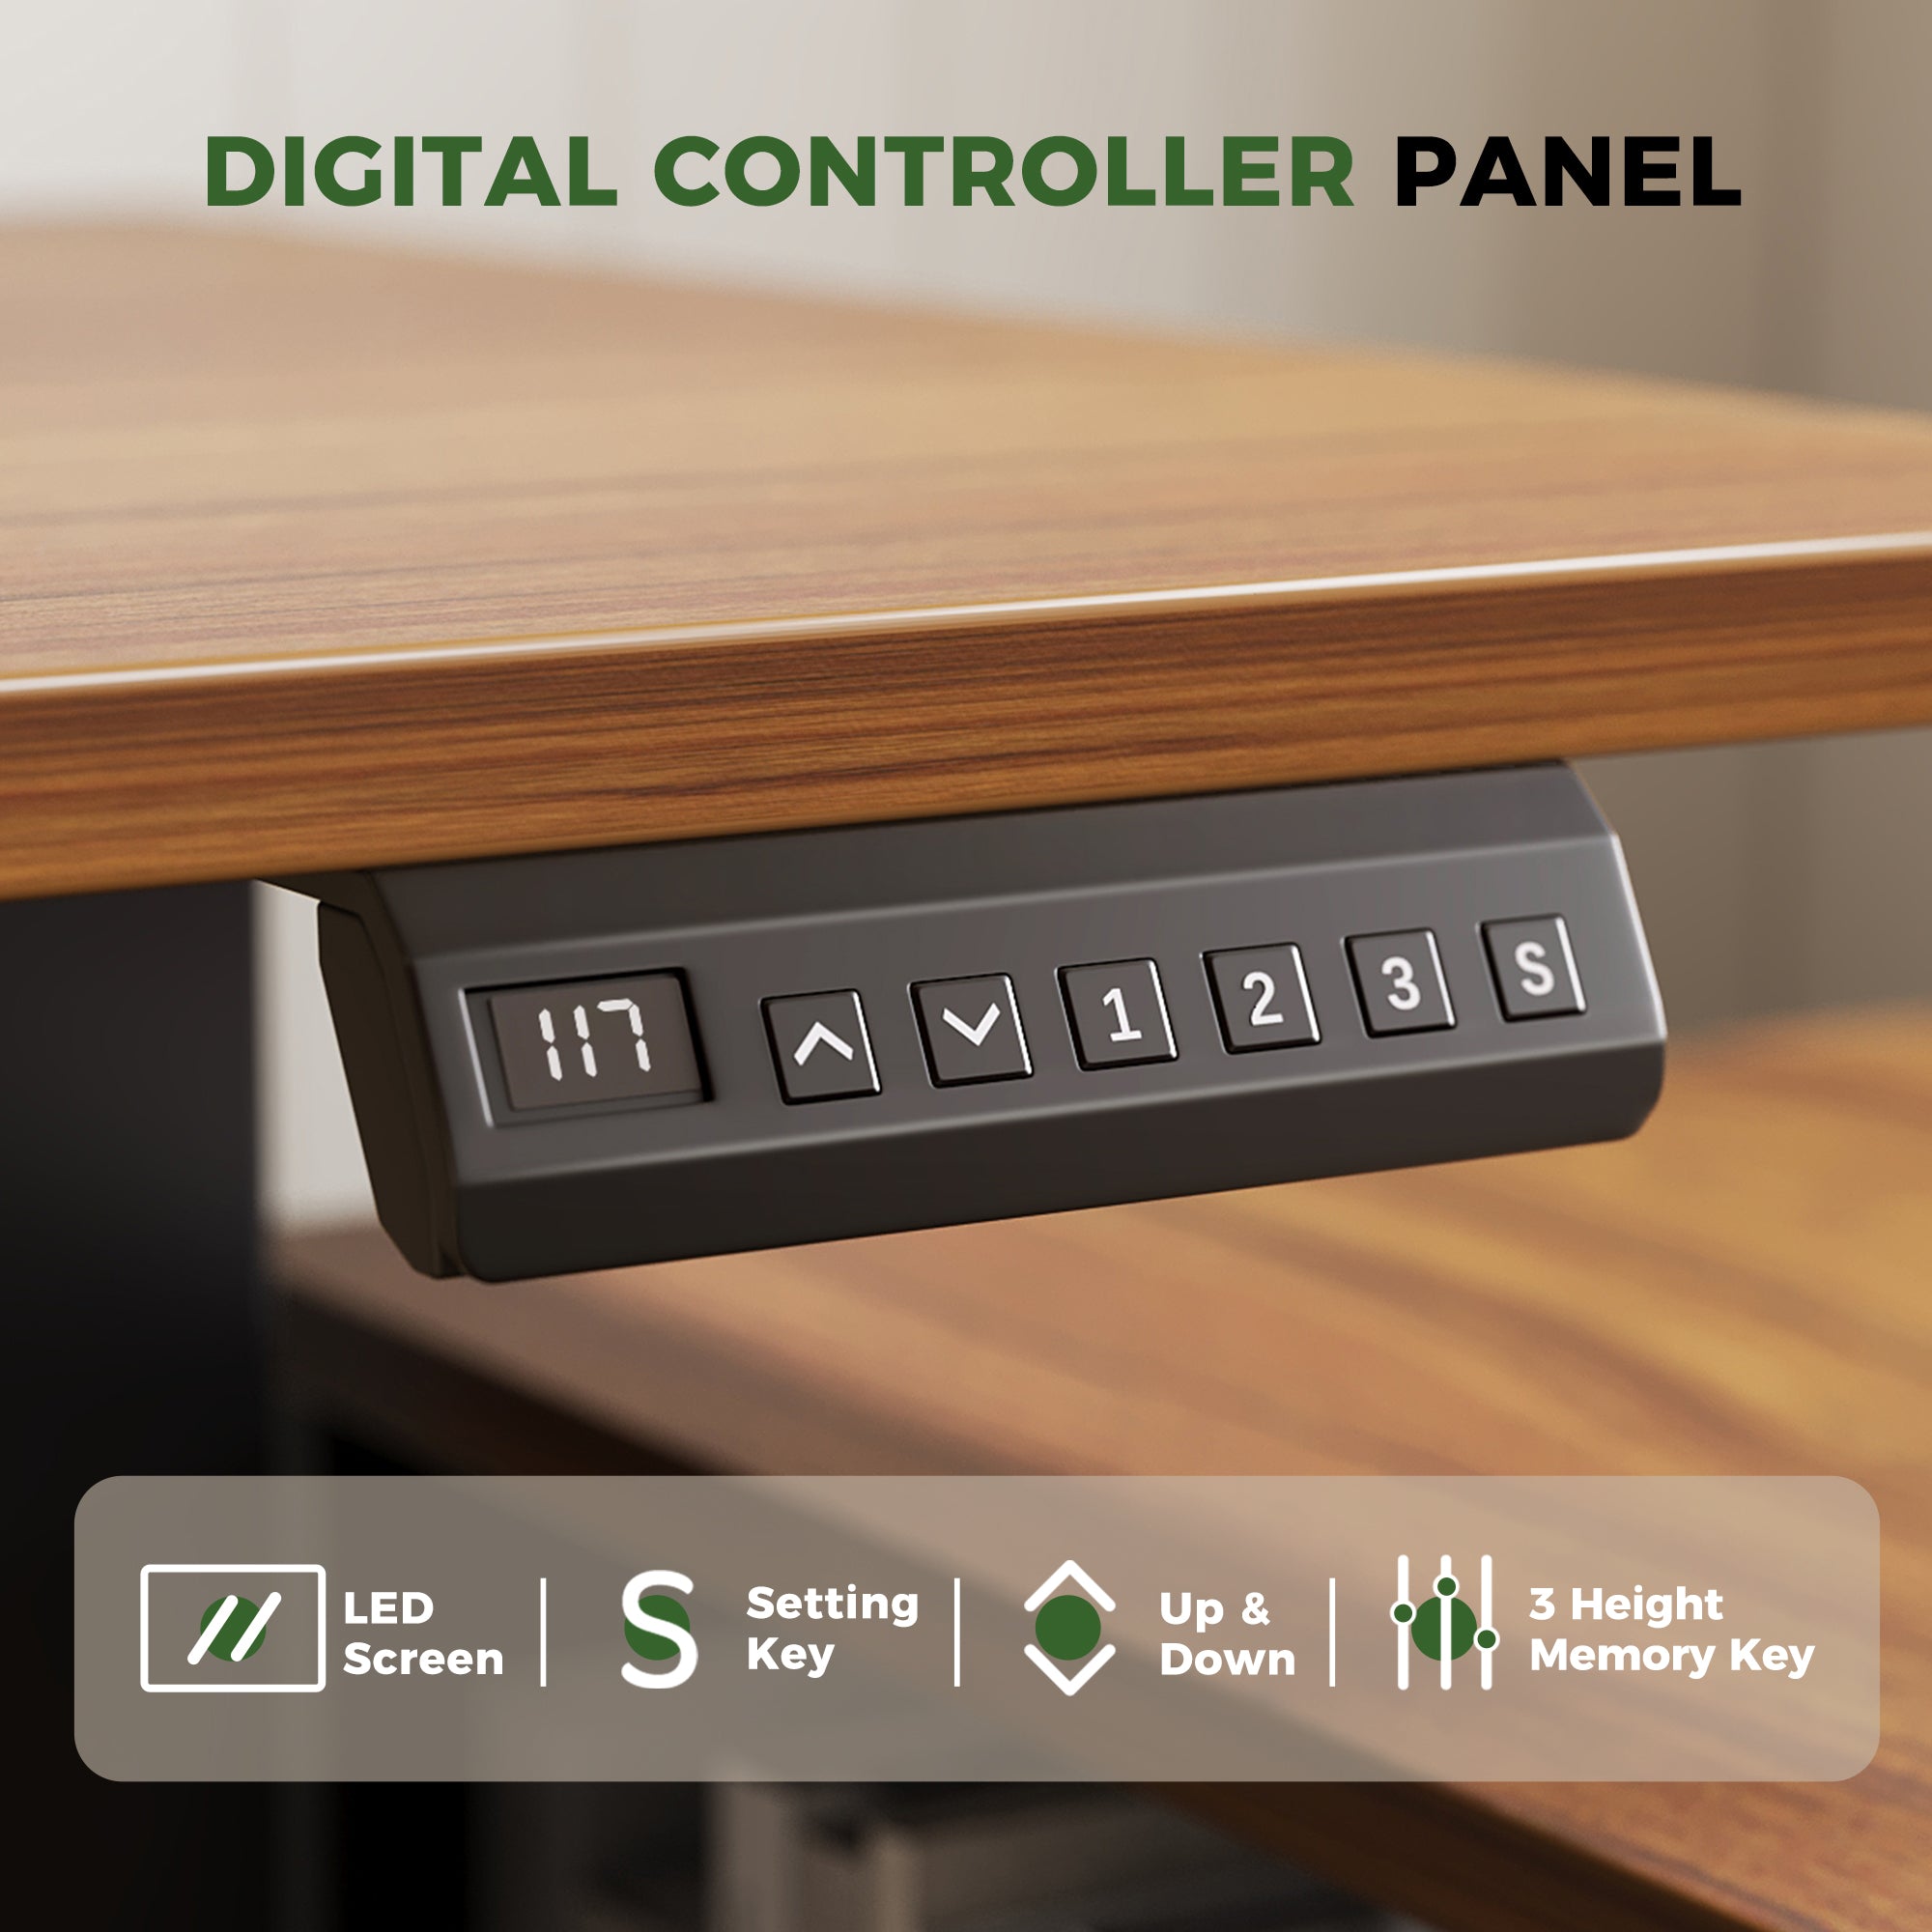
If switching positions takes effort, you will avoid it on busy days. Choose controls you can operate without looking down for long: an LED height readout plus at least three memory presets is the sweet spot for most home offices (sit, stand, and “perch” or meeting height). Then program them immediately after assembly, before you build habits around awkward heights.
On the OffiGo model, the control panel shows current height on an LED screen and includes three programmable memory buttons. Set Preset 1 for your seated typing height, Preset 2 for standing typing height, and Preset 3 for a slightly lower standing height you can use for reading or handwriting. This is a simple productivity move: you stop negotiating with the desk and start using it.
5: Build in storage, not clutter (so your eyes stay on the work)
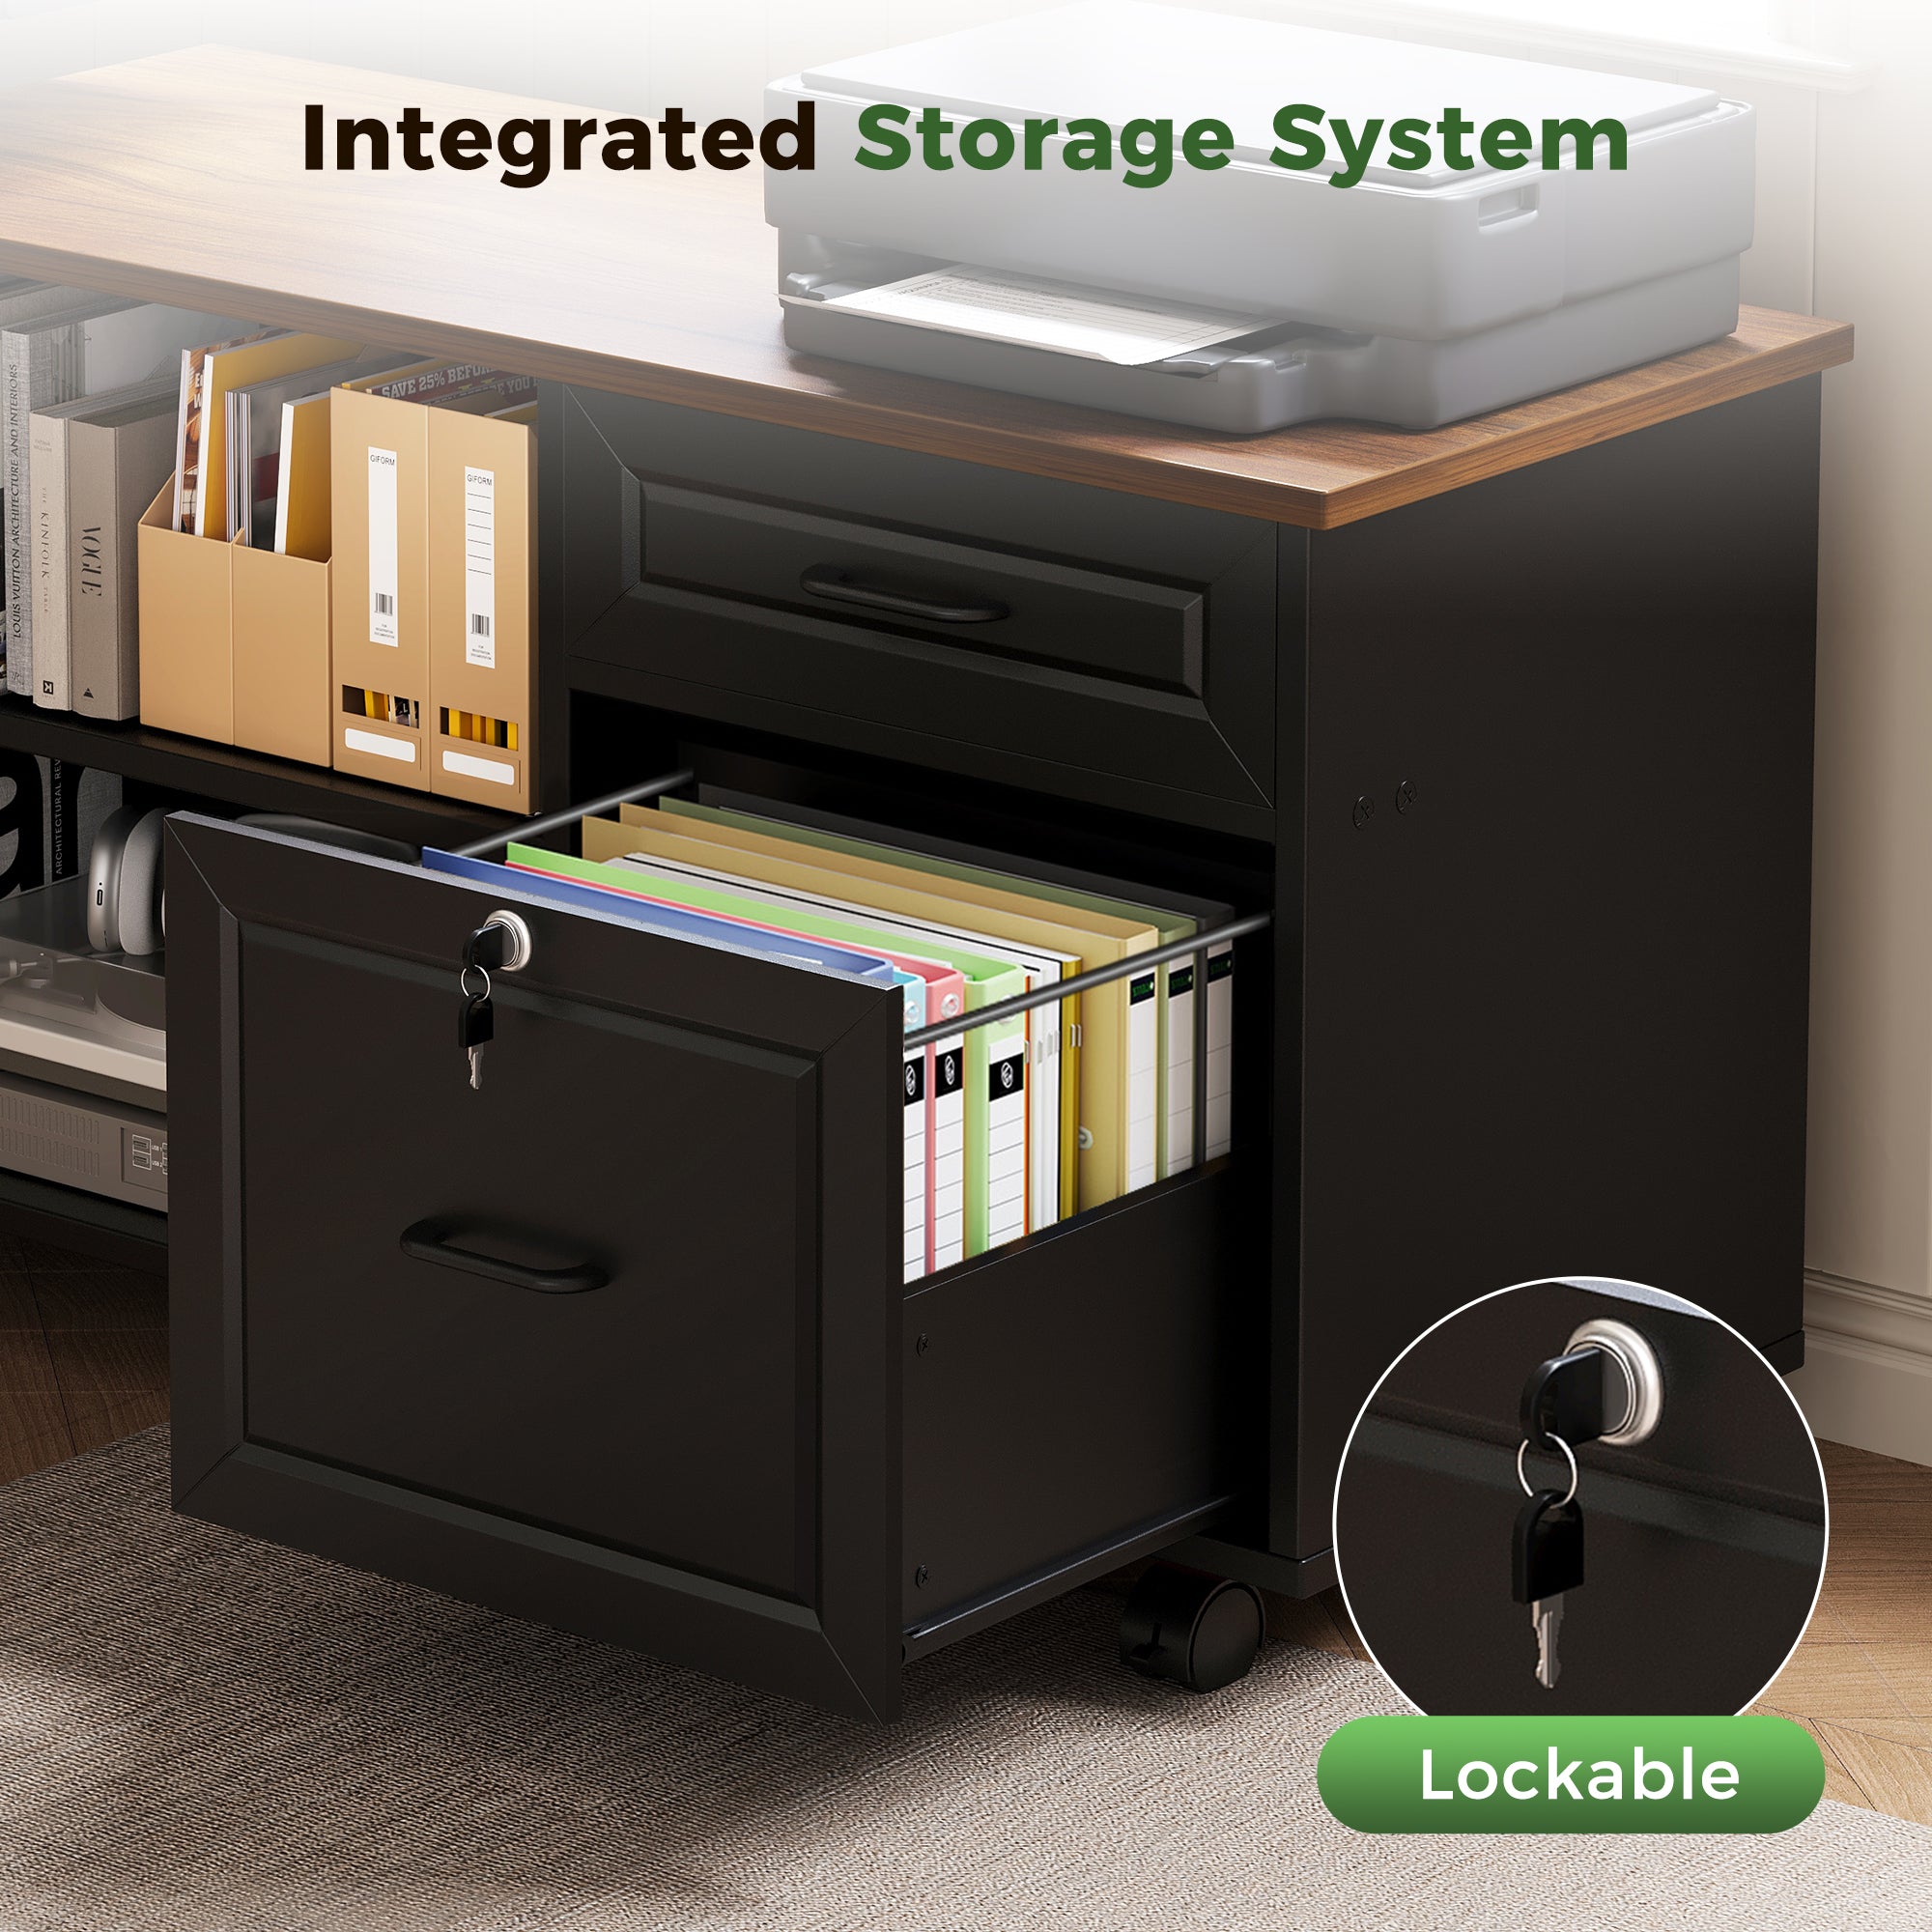
Treat storage as part of the workflow, not a place to hide mess. The goal is to reduce surface decisions: where papers go, where cables go, where “not today” items live. If you do paperwork, dedicate one drawer to active folders and one to archive, and keep only the current stack visible. If you do creative or technical work, dedicate a drawer to input devices, adapters, and spare cables so they never live on the desktop.
The OffiGo approach is especially practical because the storage is not just a shallow drawer. The side cabinet is designed to hold office supplies and files, and the cabinet includes a lockable compartment. Use the lockable section for sensitive documents or equipment you do not want constantly in view, and keep the open shelving for items you grab daily (headphones, notebooks, reference binders). Less visible clutter means fewer “micro-starts” and fewer focus breaks.
6: Plan cable and power routing (so nothing snags when the desk moves)
Do this before you zip-tie anything: raise the desk to maximum height and lower it to minimum height while watching where cables tighten. You want a controlled “service loop” (a gentle slack curve) that never becomes a hanging tangle and never pulls tight at full extension. Route cables to a single side (left or right), then bundle them into one trunk down a leg.
This matters even more on setups that include productivity tech like Retail SaaS dashboards, Social Commerce tools, Consumer Behavior Analytics tabs, or Omnichannel Strategy workspaces where you tend to run extra monitors, hubs, and chargers. If you also use O2O Commerce and Local SEO workflows, you might have a dedicated tablet, phone charging dock, or second laptop for Near Me Search Optimization checks. The OffiGo model does not include integrated power outlets, so you should plan a clean under-desk power strip location and a simple cable tray path from day one.
- Place a surge-protected power strip under the desktop (not on the floor).
- Add one cable tray or wire basket centered between legs.
- Bundle by function: display cables, power, and peripherals.
- Leave 2 to 4 inches of slack at the desktop edge.
Scenario Variations: Adapting Standing Desk Features for Different Workflows
Dual monitors plus printer
Put both monitors on the 55.1-inch main surface, then put the printer on the cabinet top so paper handling stays off your keyboard lane. Keep one drawer for paper and labels, and store spare ink or toner in the cabinet so you do not “temporary place” it on the desktop.
Small room setup
Run the cabinet inline so you do not lose side clearance. Keep the chair path clear by routing cables down the far leg, and avoid floor power strips where chair wheels can catch cords.
Shared desk users
Use the three memory presets as “User A sit,” “User B sit,” and a shared standing height. Then re-check each user monthly, because small changes (chair height, shoes, keyboard tray) often drift.
Paper-heavy admin work
Use the cabinet as a true file bay: active projects in one drawer, archived in another, supplies on shelves. Keep only the current folder on the desktop to reduce visual noise.
Troubleshooting
| Problem | Cause | Solution |
|---|---|---|
| Desk wobbles when typing | Uneven floor | Level feet, add thin mat |
| Shoulders feel tense | Desk too high | Lower to elbow height |
| Wrists bend upward | Keyboard too high | Add low-profile keyboard |
| Cables snag on movement | No slack loop | Add service loop, re-tie |
| Drawer hits chair | Tight clearance | Switch cabinet to inline |
- If the desk still wobbles after leveling, move the heaviest items (monitor arms, printers) closer to the leg columns to reduce leverage.
- If your shoulders stay tense, lower the desk 0.5 to 1 inch and raise your monitor slightly instead of raising the surface.
Conclusion
Productivity-focused work does not need more gear, it needs less friction. Lock in a usable height range, insist on stability at standing height, and design a surface layout that keeps your keyboard lane clean. Then make controls, storage, and cable routing so easy that switching positions becomes automatic.
If you want one desk that bakes those priorities into an integrated home office setup, the OffiGo 55-inch L-shaped electric standing desk with its movable storage cabinet is a practical pick: spacious main surface, dedicated storage, flexible cabinet placement, and simple memory presets.
OffiGo: Standing Desk for Long Working Hours | Built-in Storage
FAQ
What height should I set a standing desk to?
Set your standing height so your elbows stay close to your sides and bend to about 90 to 110 degrees while typing. Start by lowering the desk until your shoulders feel heavy and relaxed instead of lifted. Then check your wrists: your forearms should feel roughly parallel to the desktop, not angled up. Re-check the height any time you change shoes, swap chairs, or add a thicker desk mat.
How do I know if a standing desk is stable enough?
Raise the desk to your real working height and type normally for 30 to 60 seconds while watching the monitor corners. A stable desk will show minimal screen shake and will not feel like it twists when you lean lightly on the front edge. Test the worst case by gently pushing on a front corner, because that is where flex shows up first. If you see visible wobble, try leveling the feet; if that does not fix it, prioritize a sturdier frame design.
Do memory presets really help productivity?
Yes, memory presets reduce the small friction that stops you from changing positions during a busy day. When you can switch with one press, you are more likely to stand for short bursts between calls or while reading. Presets also keep your posture consistent, which helps avoid creeping into a too-high or too-low position over time. Program at least two heights (sit and stand) and keep a third for a perch or reading height.
Is an L-shaped desk better for focused work?
An L-shaped desk can be better if you assign one side as the focus zone and the other as a staging zone. Keep the keyboard, mouse, and primary monitor in the focus zone, and put paper stacks, printer access, or charging docks in the staging zone. This separation reduces visual noise and prevents tools from drifting into your typing lane. If your room is tight, use an inline layout so the extra surface does not block chair movement.
What should I do if my desk cables pull tight when I raise the desk?
Stop the desk, lower it slightly, and unplug devices before you re-route anything. Add a controlled slack loop near the underside of the desktop so the cables can move through the full range without tension. Bundle cables by type and route them down one leg so they do not swing into your knees. Finally, test again by running the desk from minimum to maximum height while watching for any point where a cable tightens.
0 comments